 Customize Web Uploads (PetFinder and Adopt A Pet)
Web Uploads Tab
Shelter Pro supports web uploads (actually File Transfer Programs or FTP transmissions) to the sites shown below.
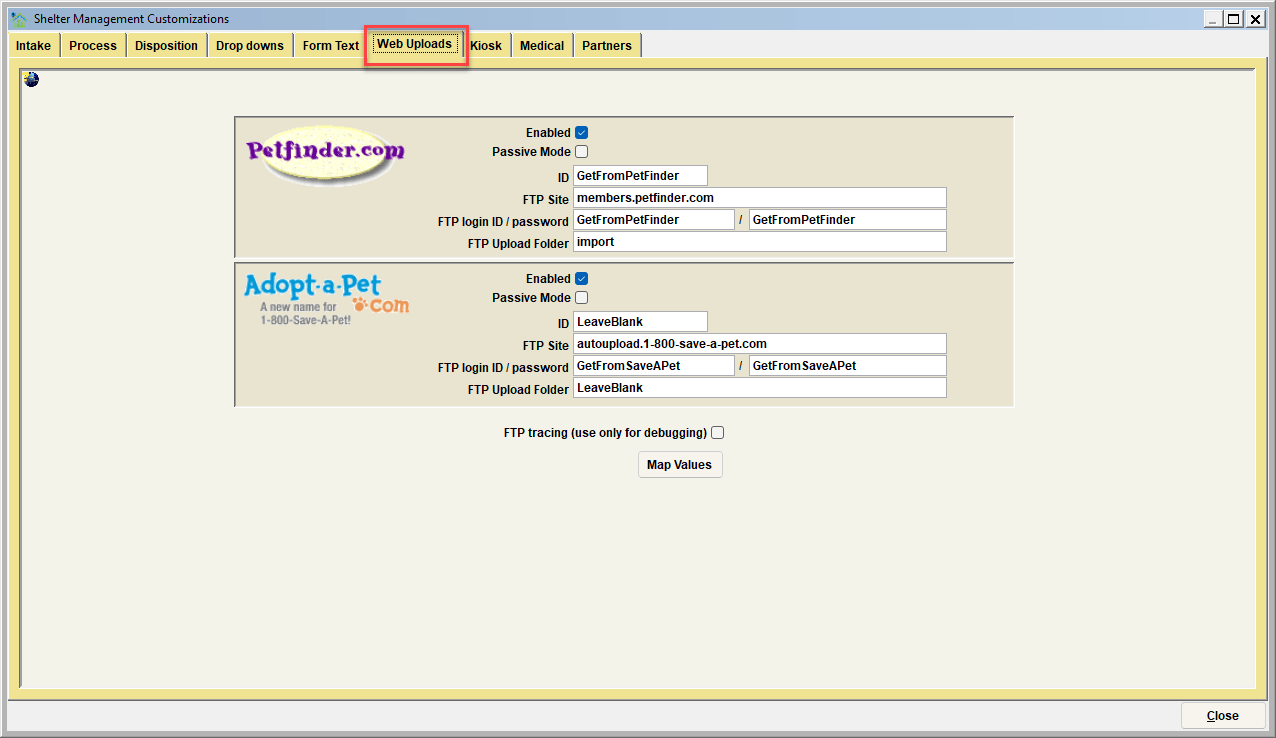
Using web upload functions is a great way to make posting your data to these websites much easier, faster, and more accurate. Note that the upload functions transmit both data and photos. There are some requirements to use these features.
- You must have an active internet connection for your computer(s) or network.
- You must work with each provider (e.g. PetFinder) to establish your upload capabilities. You will need to contact each provider to get this process complete. Once this is done, the provider will give you the data items needed to enter on this screen. For this example, we will use PetFinder.com for the discussion. Keep in mind that the same things must be done with each provider independently.
- Plan to spend some time verifying that your "Map Values" exactly match each provider's data requirements and expectations.
Here are the typical steps you would follow to get one of these providers working. We will use PetFinder for the purposes of this discussion.
- You must contact PetFinder by emailing them at Help@PetFinder.com. Let PetFinder know that you are using Shelter Pro and want to establish FTP upload capabilities for your animal data.
- PetFinder will give you instructions on how to apply for FTP access to their system. Once this is done, they will let you know the information needed to enter on the sample screen shown here. The fields needed will be:
- Ensure both the "Enabled and "Passive Mode" checked boxes are checked.
- PetFinder ID - this is also called shelter ID
- FTP Site - this is the website address where Shelter Pro will connect for transmission.
- FTP login/password - this is a user id and password necessary to login to the FTP site and address and commence a transmission.
- FTP upload folder - this is the folder on the FTP site where Shelter Pro will transmit data.
- Enter the items from step 2. Be sure to check the "FTP?" indicator, so Shelter Pro knows that you intend to transmit data to PetFinder.
- Test it out. You will do this by running the extract/upload functionality. See the Shelter Management chapter for details on how to use web upload features. You should expect that during the initial uploads that there may be some data mapping changes required. We will discuss the "Map Values" features below.
Tip: To establish Web Uploads for the other providers, follow the same steps
Mapping Values
Because each website provider (PetFinder, Save-A-Pet) is independent, each has very specific requirements for the data content they will post to their database for website presentation. There are differences between each provider. Be sure to ask each provider for the most recent data requirements. This will be a document that will let you know about things such as:
- Their recognized breeds list
- Their recognized status values (such as Holding, Adoption Available, etc.).
- Their recognized age, size, gender codes, etc.
After your data is transmitted to each provider, the data will go through an error check process which will flag any discrepancies. For any animal record with a discrepancy, the animal will most likely not be posted to the website until the discrepancy is resolved. Examples of these discrepancies and how to resolve them will be discussed below.
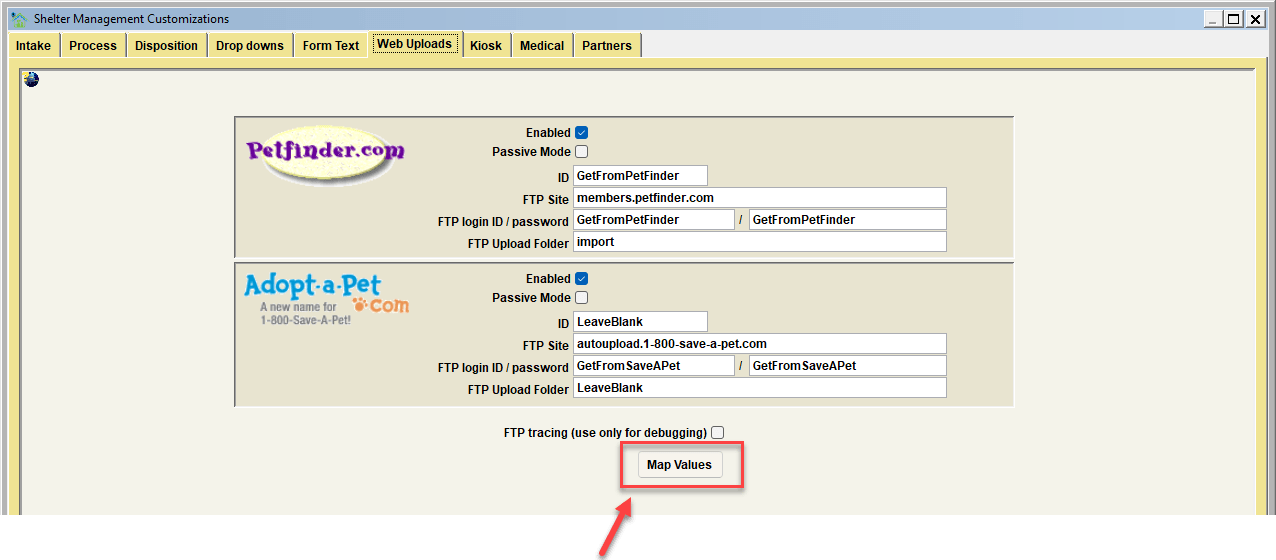
The majority of discrepancies will be with corrected using the MAP VALUES features. This is accessed by clicking the "Map Values" button.
The Mapping Values for the WebUploads screen is shown here. Keep a few things in mind about mapping values.
- Most websites are case-sensitive in their data requirements. In other words, if they expect a specific value to be sent as "Cat", and we send them "CAT", the record will reject during import to their database.
- In some instances, the values differences are more dramatic. An example would be PetFinder's animal status. On Shelter Pro we may know an animal's case status to be "ADOPTION AVAILABLE". For these PetFinder would be looking for a simple "A" to show on the incoming file for them to recognize the animal as adoptable. We'll see an example of this during this discussion.
Example: Dog Breed Mapping
In this first example, we will talk through a Dog Breed mapping scenario. Let's say that on Shelter Pro we have a dog breed called "AMERICAN PIT BULL TERRIER". However, the website providers recognize this same breed as follows:
PetFinder -> "Pit Bull Terrier"
Adopt-A-Pet -> takes the Shelter Pro value as is
Shelter Pro Portal -> takes the Shelter Pro value as is
If we were to transmit a dog with the breed AMERICAN PIT BULL TERRIER to Petfinder, the pet would not post because their system does not recognize the breed. However, they would recognize the correctly coded value for this same dog if we were able to translate it to their recognized value for this breed.
To resolve these differences, we can use the Mapping Values feature. Notice below we have selected the BREED_DOG category and our Shelter Pro recognized breed of AMERICAN PIT BULL TERRIER. After selecting these two items, we see a message that no translation values have previously been defined. To enter our translated values, we must click the Add button.
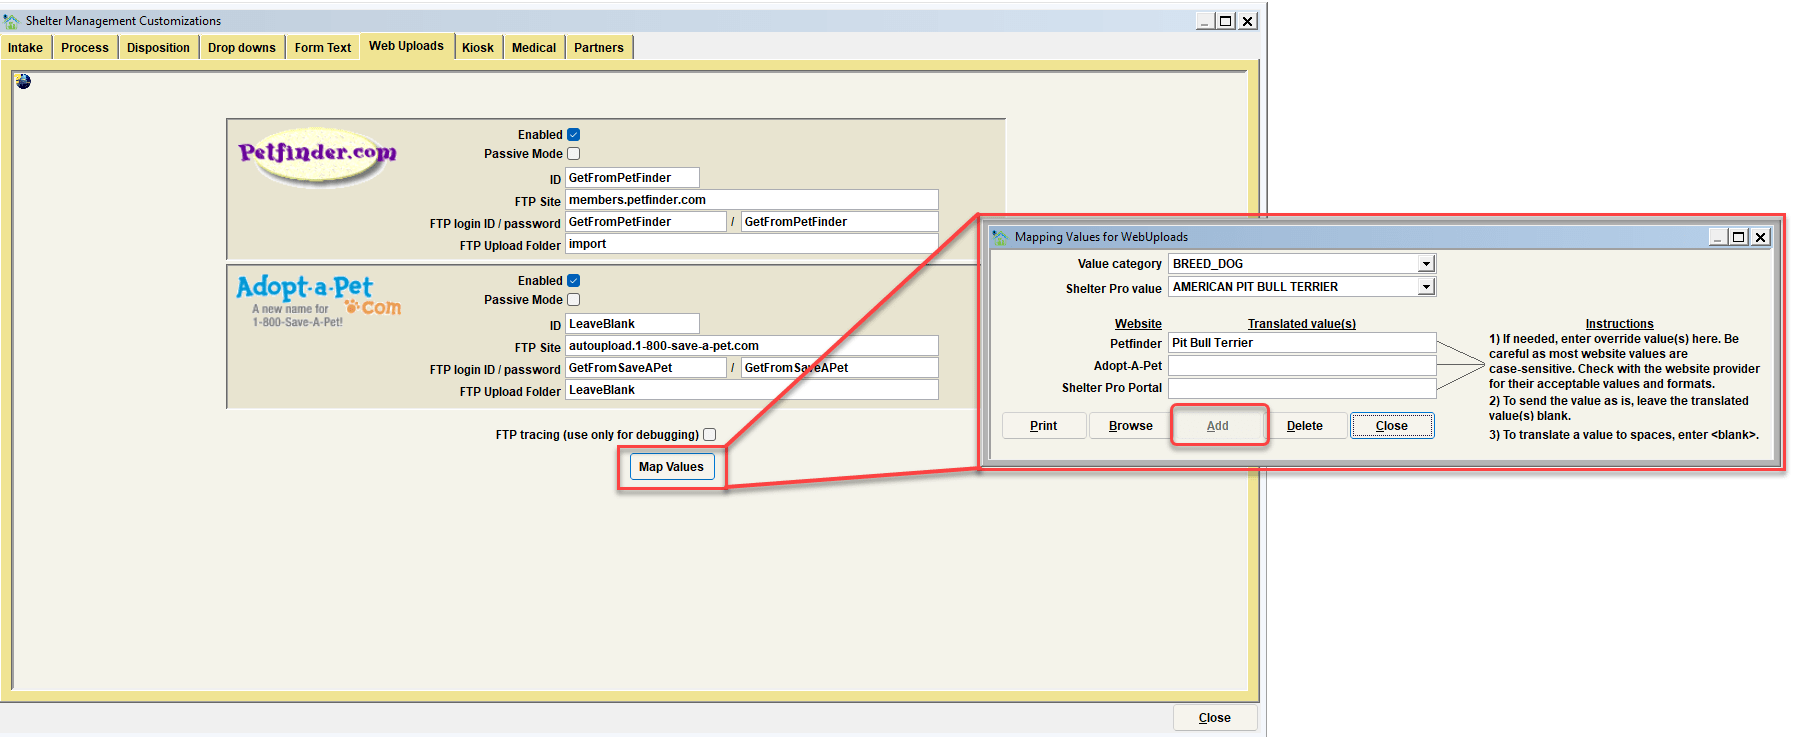
After clicking the Add button, we can now enter the appropriate Translated Value(s) for each of the providers to meet their requirements.
Tip: If the Add button is grayed out,
this means Translated Values have already been entered and can be changed in the Translated Values fields.
To put this example in context, think of it like this:
- When we have an AMERICAN PIT BULL TERRIER to post to these websites, we will send a breed of "Pit Bull Terrier" to PetFinder, and "American Pit Bull Terrier" to Adopt-A-Pet. We know this translation needs to occur because their data specifications indicate their recognized Dog Breed list.
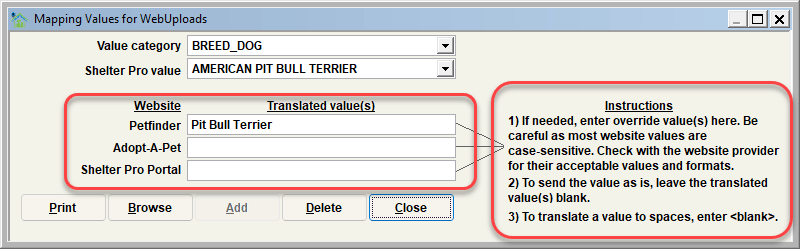
Be sure to notice the onscreen instructions. These will give you some guidance on entering values. A few points worth mentioning here include:
- If you must enter a translate value, be sure to get the case right. Whatever gets entered in these values will be sent exactly as typed. So if you entered "Pit BuLL Terrier" for PetFinder, all for each AMERICAN PIT BULL TERRIER sent PetFinder will reject the record during import.
- If the Shelter Pro value and website value match, don't enter a translate value. This includes if they don't match on case. The functionality built into Shelter Pro recognizes which data items are usually case-sensitive and applies the PROPER format to them. So, for example, on Shelter Pro, the value "AFFENPINSCHER" will be sent to PetFinder and Adopt-A-Pet as "Affenpinscher" without creating a mapping translation.
- In some cases, it may be better to send a blank value. An example might be if we kept an obscure Age code that would be meaningless to others, such as "???". In this case, it would be better to simply send the Age field as blank. To accomplish this, you would enter
for the translated value.
This final example is intended to solidify the mapping values feature.
To put this example in context, think of it like this:
- When we have a Shelter case with a status of ADOPTION AVAILABLE, we will send a value of "A" to PetFinder, "Available" to Adopt A Pet. These values indicate to each website that the case is available for adoption, and will show as such.
It's worth restating that knowing how values must be mapped to each provider requires you to have their data requirements documentation. Without it, you're guessing.
It's also important to realize that some level to monitoring and testing may be required when mapping values are changed. This would involve making a mapping change, doing an upload and import, and then assessing the results. If an animal with a mapped value shows on the site, then things are probably working as expected. If an animal is not showing, there may be a mapping discrepancy that needs to be identified and corrected, as we've discussed these past few pages.
Finally, notice the other buttons on the Mapping Values view.
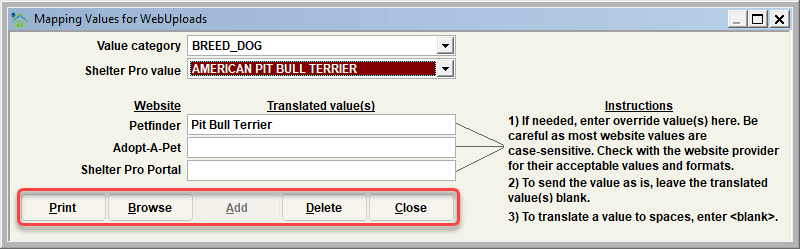
Print - The Print button will print a report of the mapping values. This is a good way to review all mappings rather than working through them one by one on this screen.
Browse - The Browse button has a similar intent to the Print button. It's a simple view of the table values intended for visual review.
Delete - The Delete button will delete a Mapping Value record completely. Once this is done, the translation for the deleted record will no longer occur.
Close - The Close button returns you to the previous screen (the Shelter Management Customization screen.
Next Topic
Customize Medical
Comment or report problem with topic